Labels

Tuesday, 17 January 2023

Sipeed M1S : Linux

In my initial post on the M1S dock I described my first look at the M1S after I received it on 22DEC22.  It includes lots of hardware functionality and a good set of demo programs are described in the "Getting Started" tutorial.  I am more interested in its capability to run linux than as a platform to develop applications so I continued to go through the excellent tutorial to find out more.

For these tests we are using the static RAM rather than an SD card.  Instead of using an external tool to create an SD card we need to use Bouffalo DevCube software to burn firmware to PSRAM so that it can be used by the C906 and E907 cores.  

The "Getting Started" tutorial provides a sample Linux image and shows you how to use DevCube to burn  it to the M1S as Linux firmware.  There is also a Sipeed github site containing the SDK (Software Development Kit) so that you can build Linux yourself.  Unfortunately the image I built didn't work properly so I used the sample Linux image instead.  I successfully burned the image to SRAM and it booted straightaway.  The (readonly) rootfs is only 2MB and there is some temporary storage available, so it is a very basic system.  It does boot extremely quickly and has the basic linux functions.


I put the M1S into a case which came as part of the package, it all fits very nicely into a compact box which is very convenient to use.  I also soldered headers onto an M1S so that one of my three boards has GPIO pins available to attach sensors and other peripherals if necessary.


The M1S package also contains a JTAG debugger which plugs into the SD card holder.  Usage is explained in the tutorial but it is a bit advanced for me so I will leave it for the moment.

As a postcript, I checked my work to build a linux kernel and noticed that there is patch folder in the github SDK tree.  Investigating further I see there is a script on github:


I ran this script, rebuilt the software, and magically I have my own linux system that I can modify at will 😊

Conclusion

Thanks to a great Sipeed "Getting Started" document I now have a basic Linux system on my Sipeed M1S SBC.  Overall I have demonstrated lots of capabilities for the board but I probably need some assistance to do more useful things.  Since the board has only been available for a month I may have to wait for people to try things out and explain what they have done.  Regardless, it is a great project which Wu Casear has set in motion.

Sunday, 8 January 2023

Sipeed M1S

The Story so far

The first RISC-V linux boards at a reasonable price (below $100) started to become available in June 2021.  They were based on the T-Head C906 RISC-V 64 bit core, incorporated into an Allwinner D1 SoC.  T-Head is Alibaba's RISC-V subsiduary and I believe Alibaba have open-sourced the core to encourage community development.  I have been very fortunate to be able to try out these boards early on in their life cycle as they are made available.

Allwinner Nezha    - signed up to IndieGoGo crowdfunding 21st May 2021, received 22nd June

Sipeed Lichee RV   -  ordered from AliExpress 24 November 2021 and delivered 16th December

MangoPi MQ-Pro    - Ordered 19th July 2021 delivered 10th August.


Crowdfunding

Following on from the Allwinner D1, Bouffalo Labs have released the BL808 Soc, also based on the C906 core, incorporating some other smaller processors.  
Sipeed announced an IndieGogo crowdfunder for the M1S dock which I signed up for on 9th November 2022 and my chips arrived on 22nd December 2022.
The campaign seems to be organised by Wu Caesar who is one of the stalwarts of the Mainline Linux RISC-V telegram forum.


Hardware

The BL808 SoC is a bit unusual in that it has 3 CPUs on board, the fastest based on C906 RISC64 core is capable of running linux. The second core is an E907 and is used for auxiliary functions such as camera image processing.

It also has logic for AI and Image Processing.

Communication is provided with wifi and bluetooth connectivity and there are both UART and OTG USB serial connectors.

One of many intruiging functions is an inbuilt FFT accelerator.

The M1S configuration I purchased comes with a camera and SPI LCD screen, all for $15-$20.

The hardware is capable of running Linux and FreeRTOS is also available.


First Look

There are many exciting features of the M1S to investigate.  Of course I need to get Linux running and check it out but before I do that (and I will post later on any successes) I had a look to check out the Sipeed documentation.  Although the board only started shipping in December 2022 there is some excellent documentation and demo programs.

When I powered up the board, the first thing I saw was me!  The demo program repeatedly retrieves images from the onboard camera and displays them on the LCD screen.  Connecting the UART and OTG USB-C connectors to the PC, I could start Putty sessions on both.  The C906 connected port showed some sort of monitor command prompt and the E907 connection showed output messages from the camera screen processing.


The sipeed wiki provides an excellent getting started guide which I could follow to try out some demo programs.  It has an amazingly good facility to load programs.  Firstly you press the two side buttons and RST to put the system into u-burn mode.  This causes the OTG to display a small 5MB drive visible on the PC.  You then copy a program to the drive and, as soon as the copy is finished the demo starts up.  This is amazing to use, within 5s you can try a different program.
In addition to the initial camera demo my favourite is a small python interface which you can use to enter python programs which control the screen (or anything else you want to do).

In summary this is a great board, with lots of interesting features, and promising documentation which I am looking forward to iinvestigating further.


Saturday, 7 January 2023

Sonos world

 I know that Sonos audio products are high quality and expensive, but I have never been very tempted to get to know them better.  My home music listening is provided by an aging but good quality Sony hifi with impressive Eltax speakers.  In addition to a CD player (rarely used) and Tuner (non-DAB, little used) I have an RPi with USB DAC connected to the hifi which I use predominantly.  The RPi runs the venerable MPD (music player daemon) to play my albums, compilations, radio stations and chart downloads and I have developed a comprehensive web front-end application to control the system.  Although I am not considering swapping over to Sonos in my study, they could be installed elsewhere.   


 Alex has recently donated four Sonos Play:1 speakers to us and the time has come to see how good the sound is and how easy they are to setup and use.  The speakers are small but perfectly formed.  Sound is very clear and there is an impressive depth/bass considering how small they are.  Although they are very expensive they hold their value well and the five year-old models we have are worth about £80 each.  They are usually connected to wifi, although they do have bluetooth and ethernet interfaces, so there is no problem with cables snaking around the room/house.


Configuration

I decided to set the speakers up as two stereo pairs.  Configuration needs to be done using an Android or IoS app on a phone/iPad on the same wifi network as the speakers.  Setup was troublesome until we did a factory reset on each speaker.  I could then create a Sonos network for the house and add the speakers in.  The Sonos procedure does a good job of finding the devices, networking them and making them part of a system  As I had allocated the speakers to two locations Sonos suggested I use them as a stereo pair and identified left and right speakers for me.

Music

Sonos is geared up to work with paid music services, such as Spotify which I don't really like and I don't subscribe to.  To start off with the only music available is Sonos radio, which isn't much use but does let us check the speakers are working.  I added a Samba shared folder on my RPi NAS which contains the music I listened to and this provided me with plenty to listen to.  My music doesn't always have very good mp3tags as it comes from a variety of sources so it is best to access it via folder names rather than albums.  I could have added music libraries from my phone or iPad but as I don't expect to be the primary user I didn't.

The Sonos app makes it easy to control music from iPad or phone.  There is also a Windows Controller which I tend to use most.

Adding a TuneIn account and linking it to Sonos allows me to play a wide variety of radio stations.  There is a paid version, with a 7 day free trial.  I hope it isn't needed for playing common commercial stations.

Connectivity

So far the setup has used standard features.  My impression is that Sonos is generally a closed system and doing things differently from the way you want to would be difficult.

I was pleasantly surprised that the Bubbleupnp app I use could see and play music on Sonos devices without difficulty.

Home Assistant integration is stunningly simple.  Within a couple of minutes I could setup Sonos within HA and play any accessible music.

Finally I found that, if I want to, I can specify my MPD output as a stream into Sonos so I could play any music / source that I currently use through my web application.

Conclusion

I was very pleased and a little surprised at Sonos capabilities and compatibility.  It is the pre-eminent high quality music system so it should be good.  I have seen complaints that Sonos want you to upgrade to the latest equipment with new features, but the old speakers we have work well with the software.  The most impressive feature, by far, is the ability to listen to separate music on combinations of speakers throughout the house.  I know this isn't easy to achieve and I think this is where a proprietary environment is worthwhile.  I was also pleased that non-revenue-generating functions are not shut out.  You can listen to your own music on your own NAS or utilise your speakers in a limited fashion from other apps,


Monday, 2 January 2023

Sleep, relaxation, meditation - one

 Getting a good nights sleep is something which is very important to me.  When it happens life is easier and more enjoyable.  It isn't a subject I have blogged, but maybe it should be.  I will start an entry and see how it develops.  

Matt Walker

Annette suggested I listen to a podcast from Zoe Science and Nutrition, The secrets of Good Sleep, which is an interview with an expert Matthew Walker.  I found it most interesting.  As a full-time University researcher Matthew Walker is able to explain many aspects of sleep and how it is affected by external lifestyle factors.

Although it wasn't a "self-help" tutorial he did mention an effective technique for falling asleep is to imagine you are going on a well-known and enjoyable walk, then focus in granular detail on what you see, hear, feel, small etc...until you hear your alarm wake you up in the morning.

There were many other sensible ideas, which are backed by research, diet is important; coffee should not be drunk in the afternoon evening; quality and type of sleep have a major effect on memory.

 He appears to have a number of podcasts on the subject which may be worth listening to.

Insight Timer

I often use Insight Timer for relaxation or to help me sleep.  Some of my favourite teachers are Jennifer Piercy, David Ji and Sarah Blondin.  I regularly surprise myself by how easy it is to change to a more positive frame of mind, simply by listening to someone talk for 20 minutes.  Before I may be tense, jaded, anxious, irritable; after I am more relaxed, happier, thinking more clearly.  It takes no more effort than sitting being miserable so why not do it?

TV Viewing with Home Assistant and Chromecast

Previously I have investigated the capabilities of Chromecast (CC).  In addition to providing a number of apps to make a TV "smart" and play free / chargeable content, CC provides the capability to "cast" to the TV content from phone, iPad or PC.  Home Assistant (HA) leverages the casting capability, allowing me to choose media within HA and play it on the TV.

In effect, I now have the same capability for video as I do for music but the question remains what use is it?  When finding and playing a youtube video, it is usually easiest to use a PC or iPad.  When watching a film, it is usually easiest to save it in DLNA and use the TV remote to select it.

HA webhooks allow you to use Chrome to select scripts or automations which HA executes for you.  For example I can easily setup a webhook to play a Youtube video on the TV and I can use an input form to select the youtube id I want to play.  I found a number of videos that I (or Harry Junior) may want to watch simply by pasting the appropriate URL into a web page.  


It would be simpler to setup a drop down menu of choices but even better, especially for Harry Junior, is to be able to press the icon for one of his favourite videos on the iPad and watch it on the TV.  As of January 2023 "Speedie Didi" is his preferred vlogger so I set up a number of her videos for him.


I may setup more webpages along these lines if they prove useful.  It would certainly make it easier to find yotube videos I want to watch repeatedly.

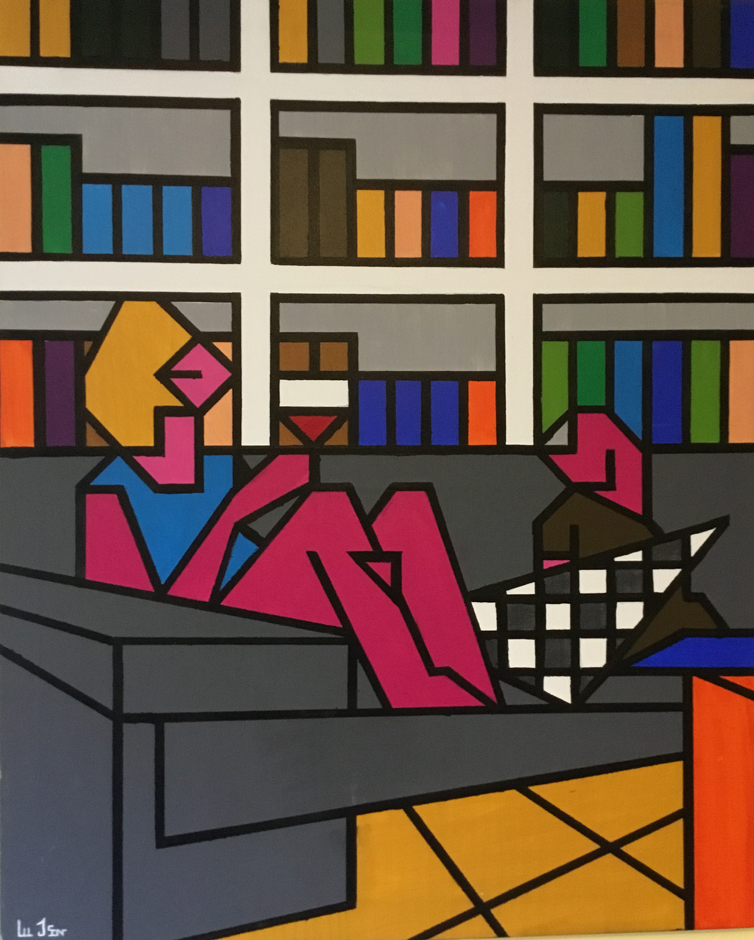
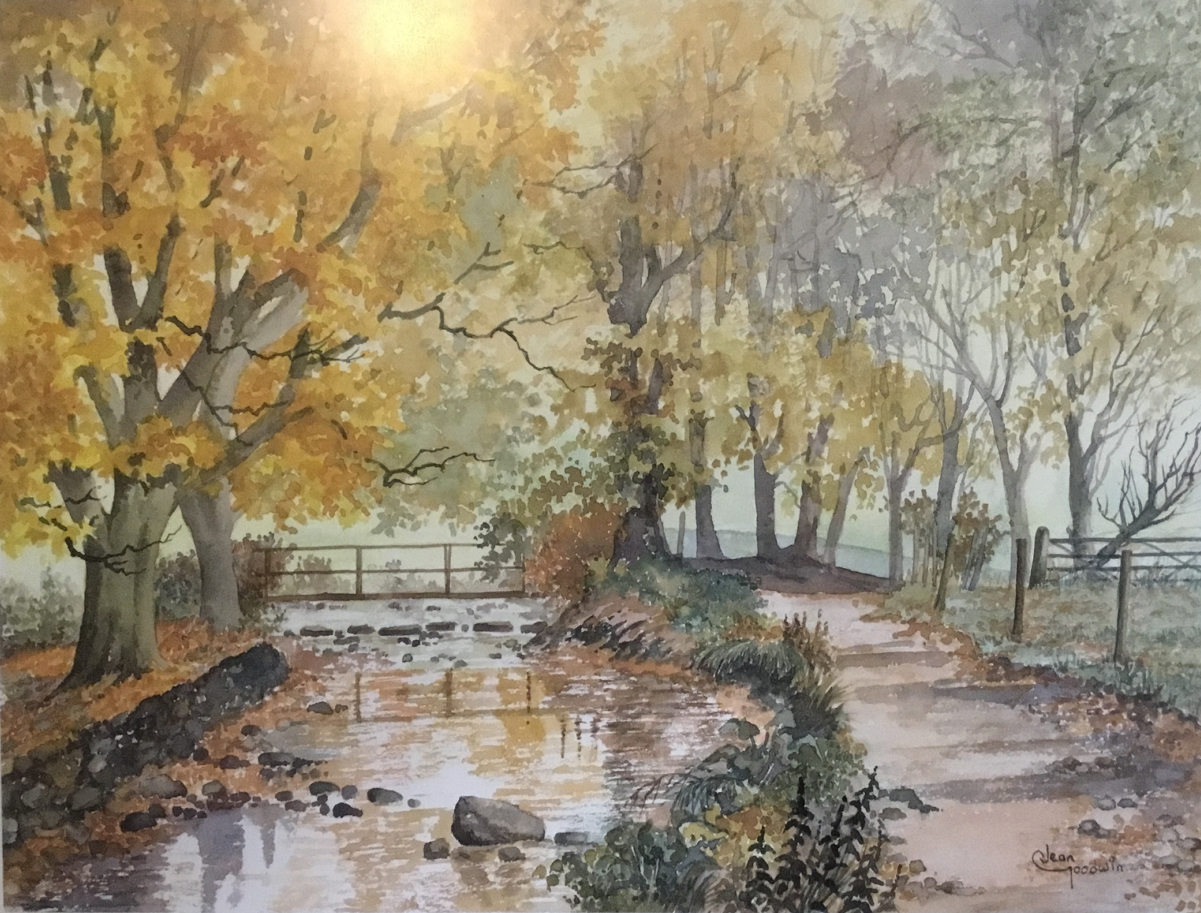
My Own Favourite Pictures


1 Lu J Son, 8PM


2 Mrs Ferguson, Sunlight on Pool


3 Leah Helliwell, Chinese Pool
4 Jean Goodwin, Autumn Gold


Saturday, 31 December 2022

My Top Ten Favourite Pictures

 A tricky question

I started off trying to decide my top ten favourite pictures, but realised it is pretty impossible to choose a list.  I Googled top ten and mostly I don't particularly like them.  Do I prefer old to modern artists, pictures showing skilled brushstrokes, is the immediate impact or story told important and how much should knowledge of the artist/picture/environment/rarity/history be important?  I appear to have another impossible task.  Annette suggested picking my two favourite artists from each century but even this proved a headache. 

Criteria

I think my main criteria are:

  • how much or how long I enjoy looking at a picture
  • is the composition interesting
  • are the colours expressive
  • whether it is an enduring opinion rather than a whim
  • is there an interesting story
  • does it have a strong emotional effect
  • is its rarity/age admirable
  • is great skill evident
  • does the work communicate a strong message 

My approach

I have a photo collection from the principal galleries I have visited so I will restrict myself to choosing from the pictures on my website.  Even so there is a great variety to choose from, I find it hard even to compare artists from different times.  My approach will be a sort of knock-out tournament.  When deciding which images to capture for my website I aim to choose about four per room and each gallery comprises a number of groups of rooms.  I will start the first round by choosing four pictures per group and move on in the second round to choose four of the winners to get the top four pictures in a gallery.  Galleries and Galley exhibitions are classified separately so I will end up with about 10 groups of four in the semi-final.

A snapshot

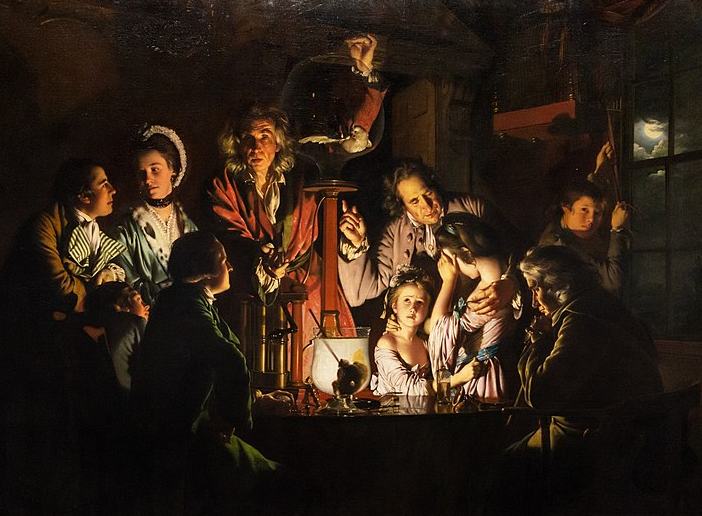
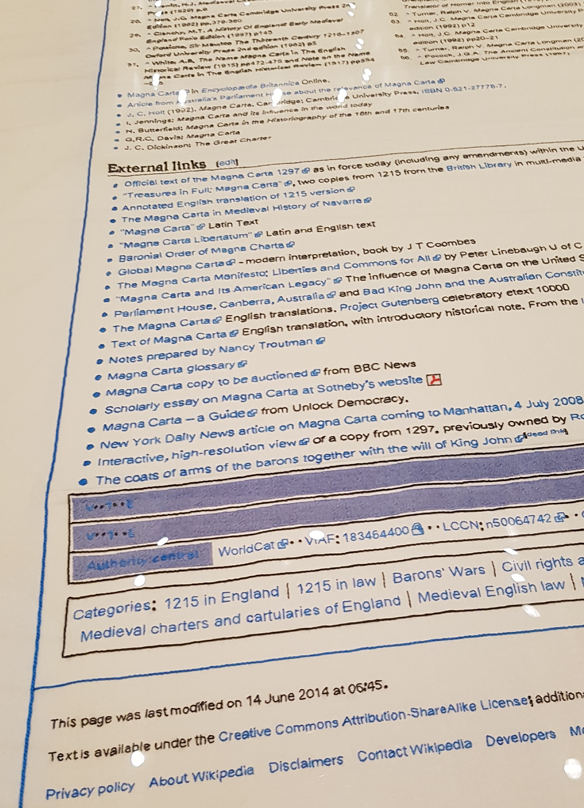
A selection of my favourite art based on those I like best and I have pinned up, in miniature, on my study wall.

1 Wheatfield with Crows, Vincent Van Gogh 1890

2 Claude Monet, Water-lilies, Setting Sun 1907

3 The Fighting Temeraire, JMW Turner 1838

4 Ballet Dancers, Degas, 888


5 Debbie Harry, Andy Warhol, 1980

6 An experiment on a bird, Joseph Wright of Derby 1768

7 Lake Keitele, Akseli Gallen-Kallela, 1905

8 Hylas surprised b Naiades, John Gibson, 1827

9 Salome, Aubrey Beardsley, 1893

10 Magna Carta (an Embroidery), Cornelia Parker, 2015


Thursday, 29 December 2022

Top Ten Best Pictures in the world

What are the ten best artworks in the world?  It isn't easy to say, even with Google's infinite resources. It seems that Lady with Pearl Earrings, by Vermeer, is one of the most famous and Da Vinci's Mona Lisa is usually top of the list.  I certainly wouldn't put them amongst my favourites and it started me thinking.

It isn't possible to define simple criteria for a "best" painting as it is a very subjective opinion based on individual preferences, knowledge, outlook, culture and expertise. A suitable substitute is to search for "most famous" which might indicate some limited consensus for excellence.

I looked at a number of search results for "10 most famous paintings" and came up with the list shown below; it is mainly based on a CNN style article with some images reproduced fron Wikimedia Commons.  As a separate exercise, on another blog entry, I will try to choose my 10 favourite paintings that I have seen/photographed.   The overlap between the two lists will be minimal.

1 Mona Lisa, Leonardo da Vinci, 1503
2 The Last Supper, Leonardo Da Vinci,1495 


3 The Starry Night, Vincent van Gogh,1889 

4 The Scream, Edvard Munch, 1893


5 Guernica, Pablo Picasso, 1937 

6 The Kiss, Gustav Klimt, 1907

7 Girl with a pearl earring, Vermeer, 1665

8 The Birth of Venus, Sandro Botticelli, 1485

9 Water Lilies, Monet, 1906

10 The Persistence of Memory, Salvador Dali, 1931


Wednesday, 21 December 2022

Chromecast

About eight years ago we purchased a small Samsung "Smart TV".  At the time we thought it was very clever as it has an ethernet connection which allowed us to use an inbuilt web browser and iPlayer.  Subsequently  it was used as a computer screen and to play media from a DLNA server.

I now want to integrate it with Home Assistant so that we can start and control videos as we do for music.  Unfortunately the Smart TV is not smart enough for this so I purchased a Chromecast to help it.

Chromecast installation and testing

As expected there is a slick installation procedure and I soon have the Chromecast working on HDMI with the usual apps such as Netflix, ITVhub available.  

Chromecast provides extra connectivity capabilities.
We can easily cast youtube or iplayer from the phone to Chromecast.
On the ipad we can cast from youtube, vlc or iplayer.
On the PC we can cast a chrome browser session to the TV allowing us to see whatever is displayed or playing in the browser.  Alternatively you can cast videos from the youtube app or vlc.
All these facilities are great but I probably wouldn't use them much in practice, so I now need to see what extras Home Assistant can offer.

Home Assistant

HA has a Google Cast integration built in and uses it to send speech or music to the Google Nest mini.  As far as HA is concerned the TV, with Chromecast attached, is just another casting device.


Using the "Browse Media" button on the card for the TV you can select a video from the DLNA server or local media and play it on the TV.  This is a great start, we can already play videos of our choice and it is as simple to use from HA as it is selecting DLNA directly on the TV.

Looking at the sample in Google Cast integration  it is easy to setup a script to cast a video to the TV.  The service is media_player.play_media, the target is media_player.john_study_tv and you just need to provide a URL and type for the media content. Running this script causes the video to play.  Now that I have a script I can use a webhook or Google Assistant command to initiate the video so I have the basis of a solution.


Clearly it is rather limiting if I have to setup a script for each video I want to play so I setup a helper, called xmas_anthem for testing.  I can can setup a number of valid options for xmas_anthem and set the value on a dashboard card.  Within the script I can now test input_select.xmas_anthem to determine which video to play.

You can also play youtube videos by specifiying suitable media_content details:


Since our first test was to play a video from DLNA it must also be possible to specify a DLNA video as the media_content.  This doesn't seem to be simple.  When looking at a DLNA video playing I can see that the media_content_id is a URL containing a numeric value (5240.mkv in the example shown below) rather than a filename.   To determine these values I would need to interrogate the DLNA server.  I have a python script which sort of does this but it doesn't work well yet.

Conclusion

I now have the tools I need to play videos on a TV, namely ChromeCast and Home Assistant scripts.  The next stage is to work out what videos I want and setup a webpage or voice commands to play them.


Sunday, 6 November 2022

MangoPi


The MangoPi MQ Pro came to my attenion on the Telegram forum, in particular Daniel Maslowski, on 22JUL22, provided a link to a review by "Bret".  It appeared to be very similar to the Nezha and LicheeRV systems.  It contains a D1 chip and 1GB memory, It seems almost as powerful as the Nezha but at about half the price.  I purchased one from AliExpress for £42.89, including VAT and shipping and it arrived 10AUG22.

The system is v1.4, apparently the first production build.  It is a noticeable "Sakura Pink" colour and comes with a convenient colour coded header.


It is the same form factor as a RaspberryPi zero so I ordered a cheap (£4) case on Ebay.  It fits very well, although you cant change the SD card without removing the case.


Mangopi.org is the home website and it contains some basic information about the hardware.  It provides links to Tina and Armbian images.  Bret.dk provides a much better introduction so I followed his instructions to download and install the Armbian headless image.

For the first startup I need an HDMI screen plus keyboard.  Unfortunately I don't have a mini-HDMI adapter so I had to buy one.  Also I couldn't plug my USB-USBC adapter in at the same time as the power so I had to by a pretty little hub, which I am sure will come in very useful as more systems move to USBC

With all the necessary hardware ready and an Armbian SD card inserted all I needed to do was startup.  This went like a dream.  I was very pleasantly surprised that the startup asked me for wifi details and then configured a DHCP IP address for me.

With this in place I can sign in through SSH and I can access the Ubuntu system.The apt command for update/upgrade work fine so I count this as a functional system 😁😀😃

LicheeRV Compatibility

There are indications (not sure where) that MangoPi is compatible with the other Allwinner D1 systems, Nezha and LicheeRV.  My idea of compatibility is to put an SD card in and see what happens.  Before doing this I needed to solder on the header pins and attach an FTDI cable so I can use a serial interface to see boot messages.  There is no documentation on MangoPi pins but the spec says that it is an RPI header so I guessed that the pins required are 6=GND, 8=TXD, 10=RXD.  This is indeed the case and booting the Armbian system shows me the early console messages (before HDMI is initialised).

MangoPi uses an RTL8273DS chip for wifi which is the same as used by LicheeRV.  So, when I booted from my usual LicheeRV SD card the system came up cleanly (and a lot faster).  Wifi is initialised properly and static address/SSH access work fine.  This is great, it means I have a Debian system for my MangoPi - without doing any work.


Monday, 10 October 2022

6502 : Move to a processor board

 It is great to have a working circuit outputting to a terminal screen and we need to work on it, primarily to speed it up using a real clock and to do proper input/output.

My initial attempts to speed the circuit up were unreliable necessitating wiring checks amongst other tests.  In fact I am not sure why the circuit was unreliable, it could have been wiring, or my Arduino nano clock or the ACIA/terminal session hanging.  At any rate the reason for using soldered boards is to prevent wiring issues and this led me to build a second board for the CPU, ACIA and control logic.

For the new board I chose an alternative strip board which provided me with 4 connection holes available on each side of the 6502 / ACIA  chips.  This makes CPU/ACIA connections much easier to specify.

The only downside is that I dont have +5V and GND rails provided for me so I have to "daisy chain" power connections.  I underestimated the work involved with these and had to amend the design during soldering.  In future I should allocate some spare tracks for power wires.  Other than this problem the soldering is easier than the memory board as a lot of address wires are not required on the board.  Off board connections are provided from the CPU to the memory board.  There is also a spare row so that I can add a lower row of chips in the spare space at the bottom of the board and connect them to the CPU.

Once the board was soldered I could check the quality as usual by testing sdjacent shorts and circuit testing each board connection to make sure there was conductivity.  Annoyingly there was one short which I missed and I later had to take everything apart to check it again later.


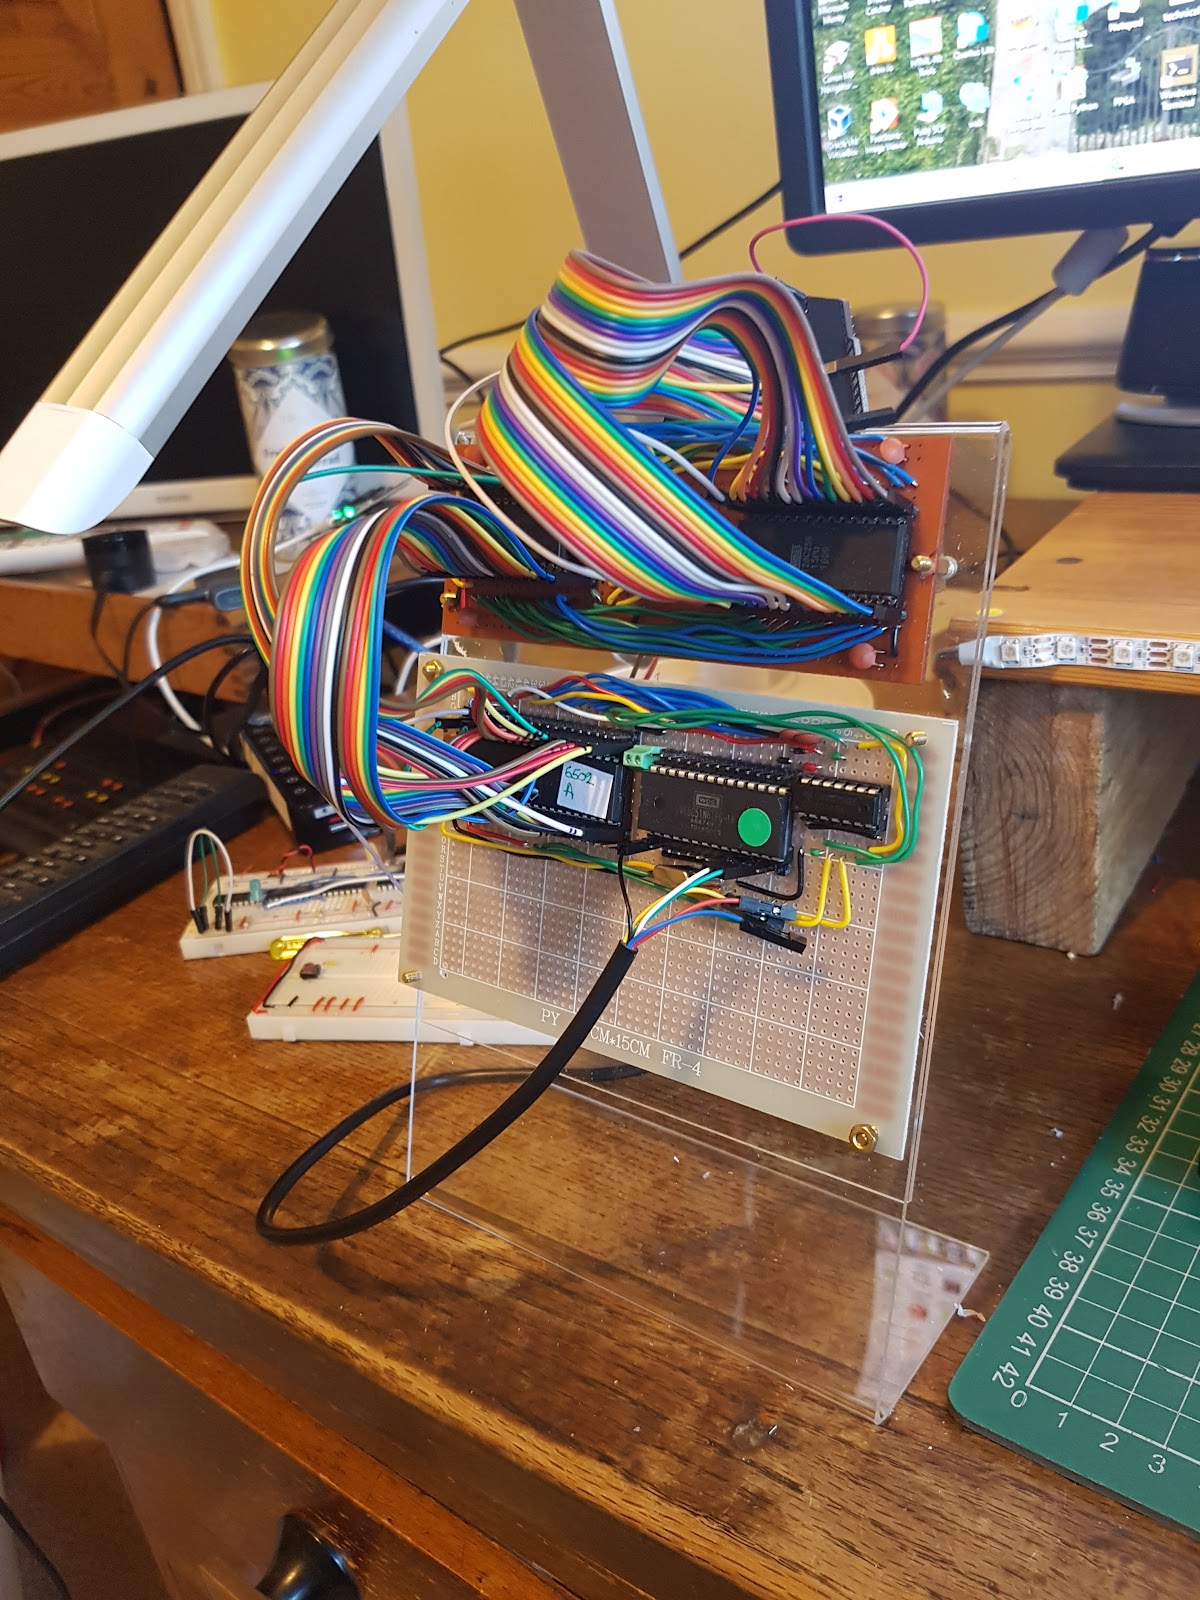
With soldering finished I could connect the new processor board to the memory board using dupont ribbon cables and test functionality using the same Arduino Mega sketches which I used to develop the breadboard version.  Having a structured set of tests makes the process a lot easier.  As mentioned above there was a shorted connection which meant the read-write pin was always in write-mode stopping the CPU from running.  Once this was corrected and I had a working board I could attach my boards to their perspex backing board, hopefully making this a more permanent board.


The board isn't nearly as elegant as I thought it would be but I am hoping it will be more reliable.  On the picture you can see that the memory board is above the processor board and there is more space below for other components / boards.
At this stage the Mega is still connected.  It is needed to download programs into ROM.  Eventually I hope we will have a stable monitor program in ROM which is capable of downloading programs to RAM for testing.

It can also be seen on the picture that the clock is separate.  Initially I have used Ben Eaters 555 timer based clock but it only runs upto 500Hz.  The W65C02 is capable of running at 1 MHz or more so I have a 1 MHz clock chip.  However if I just substitute the 1 MHz clock for the Ben clock it doesn't work.  I need to be able to slow down the 1 MHz clock to see how fast I can run it.  To do this I purchased some CD4020 binary counter chips.  Using one of these chips I can reduce the clock speed by a factor of 32768 to about 30Hz.  Using a second counter I can reduce the speed further.

My breadboard version of the circuit worked upto about 5000Hz, first tests on the new processor board indicate that it will work upto 50KHz or more which is what I really wanted to see from this exercise.

Postscript 

[November 2022]The story didn't have a happy ending!  I couldn't get the ACIA serial interface to work reliably and progress on writing software slowed to a halt.  DON is now on hold.  The next step may possibly be careful debugging, but is more likely to be a replacement board.

Sunday, 11 September 2022

6502 Terminal

ACIA Serial Chip

My working 6502 system needs some input / output capability.  Ben Eater added a VIA (Versatile Interface Adapter) and attached an LCD display to his system.  I prefer to start with an ACIA (Asynchronous Communication Interface Adapter).  This provides me with a serial interface running at 19200 baud.

An ACIA chip was added to the breadboard and connected using an FTDI chip to a PC USB COM port.  The hardware allows me to use a Windows Terminal or Putty session providing a screen and keyboard interface.  I could attach a physical terminal, but they don't really exist anymore and a PC terminal session works just fine.  I did build a physical terminal using an LCD screen a while ago but I don't need it here.

Arduino Testing

My inspiration for the ACIA connection is Dirk Grappendorf who provides an excellent description and code to terminal I/O.  

To check my breadboard connections I designed a sketch which ran on the Mega without the need to use my CPU.  In fact I did have trouble getting the ACIA to work as an extra capacitor is required which Herr Grappendorf mentioned but I omitted as it wasn't shown on the datasheet.

The ACIA is controlled in a very simple manner.  Two bytes are written to the command and control registers specifying communication parameters.  Subsequently bytes which are inserted in the transmission register are sent to the FTDI and onwards to the PC terminal session.

6502 Machine Code


Once I was happy that wires and the ACIA were working I could write a very simple assembly program which writes the command register (address $4002) the control register (address $4003) and then loops to output a character (0x34, the digit 4) in the data register (address $4000).


The result is a 17 byte program which puts a steady stream of characters out on the terminal.  There isn't any synchronisation by the program to ensure that the terminal is ready for the next character before transmitting it, we simply send characters as fast as we can.


Add RAM

We dont actually require RAM for this version of the program to work.  RAM is required for the 6502 stack, which is used by the subroutine mechanism to store return addresses.  Adding a subroutine to the program allows us to check that RAM is still working.

Clock Speed

Initial testing is carried out using the Ben Eater clock, which is a 555 timer based solution which runs at speeds upto about 200Hz.  Previously I have built an Arduino nano-based clock which allows me to choose between a number of speeds 5 Hz, 50 Hz, 500 Hz and 5000 Hz.  When I substituted the nano clock into the system I found that it worked.  However, as expected, the system didn't work when the full-speed 1 MHz clock chip was connected.

Summary  

We have added a terminal to our 6502 system so that we can do input / output.  We wrote a very simple machine code program as a first test that output to the terminal works.  Normally the "terminal driver" would synchronise transmission and receiving but we had good results with a 5 KHz clock sending characters as fast as we could.
What we really need is a software environment to assemble and load programs so that we can better, more extensive programs - this will come next.